
We honor reciprocal links.
Hi Pentaxian friends.
Previous lessons: Lesson 1, Lesson 2
Lesson 3 - Depth of Field / Hyperfocal Distance
Depth of Field
The depth of field is the measurement at which subjects, located at various distances from the DSLR, are in focus. Depth of field changes each time you change the aperture. The lens' focal length also affect the depth of field. A telephoto has a shallower depth of field than a wide-angle lens. Assuming that you are using a 50mm lens with a maximum aperture of f/1.4 and a minimum aperture of f/22, using the larger aperture (f/1.4) would give you the minimum depth of field. In other words, the area before and after your focusing point would be shallow. Look at the photo below:

Using the small aperture such as f/22, would give you the maximum depth of field. In other words, the area before and after your focusing point would seem in focus from near the camera to near infinity. Look at the photo below:

On modern DSLR cameras, when you compose your picture looking through the viewfinder, the lens' aperture is always opened to the maximum. To get a peek at what the final picture will really look like, most DSLRs have a depth of field preview button. Some even have a choice of giving an optical preview (in the viewfinder) or previewing the image on the LCD monitor. When using the optical preview, the smaller the aperture (less light in) the darker the preview. The preview is primarily to check the depth of field. However, if your camera is equipped with previewing on the LCD monitor, the image will appear as it would if you press the shutter release button.
Does shooting at the smallest aperture render a sharp image from the foreground to infinity? The answer is: Not necessarily.
Hyperfocal distance
On most lenses, even modern auto focus lenses, a distance scale shows the distance at which the lens is focused. Using a lens focused at infinity and at a small aperture, f/16 for instance, will render a sharp image of far away subjects but the sharpness of the foreground might not be optimum. Depending on the lens' focal length, the closest focused distance of the lens may be 10 or 20 feet away. This is when you want to take advantage of the hyperfocal distance of your lens. The hyperfocal distance of a lens is defined as follow: The closest distance at which a lens can be focused while keeping objects at infinity acceptably sharp; that is, the focus distance with the maximum depth of field. Take a look and download this free Hyperfocal distance chart from DOFMaster.com
http://www.dofmaster.com/charts.html
When the lens is focused at this distance, all objects from half of the hyperfocal distance out to near infinity will be acceptably sharp.

Hyperfocal distance shooting is mostly used with wide-angle lenses to about 100mm lenses. Lenses with longer focal lengths have a depth of field too shallow to produce acceptable sharpness from the foreground to infinity.
It is commonly used for street photography, as you want to take your picture as quick as possible. You simply set your aperture (as small as light permits), focus your lens manually at the hyperfocal distance, and make sure your subject is within half the hyperfocal distance to infinity. Using a 50mm lens at f/16, your subject would have to be from 8.5 feet to infinity, to be sharp.
Download this depth of field chart from the same source
With it, you can check what the closest and farthest depth of field is for any lens at any aperture. If you look at the comments below, you can see that the Circle of Confusion (CoC) affects the depth of field. If you like formulas, you can immerse yourself in the calculations as shown on the following site.
Thanks for reading,


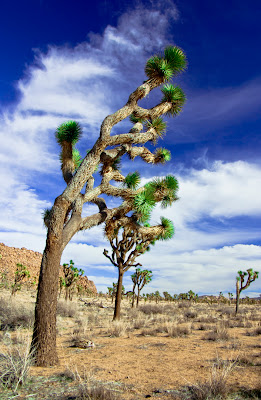
 This post will not make you an expert in photography alone. Like any other skill we learn, practice is what makes us excel in any of our undertakings. There are many books on photo techniques on the market that you can get to further learn the craft or art of photography. For years, Kodak has regularly publish updated books targeted to beginners all the way on up to the professional photographers. Of course, lots of information is also available on the internet.
 The aperture, being the lens diaghphram opening, lets more or less light pass through the lens. The f-number (aperture opening) is proportional to the ratio between the lens focal length and aperture diameter, which is proportional to the square root of the aperture area. Big analogy but what does all that means? Well, lenses are usually marked with the F-numbers ranging from the largest aperture to the smallest aperture. For example, a typical lens could have an aperture range of f/2.8 to f/16. The lens would be marked as follow : f/ 16, f/11, f/8, f/5.6, f/4, f/2.8. In this example, the largest aperture would be f/2.8 while the smallest would be f/16. Have you noticed something a little surprising here? The larger the number is, the smaller the aperture is. You need to remember that. Furthermore, each (f-stop) number to the right lets twice the amount of light in as the (f-stop) number to its left and each (f-stop) number to the left lets half the light in as the (f-stop) number to its right. For example, f/4 lets twice as much light in as f/5.6 but only one half the light of f/2.8, and so on. One unit of increment in aperture is called a stop.
 Numbers to the left are letting 1/2 (or twice as less) light in.
 In photography, shutter speed is the length of time the shutter takes to open and close. The total exposure is proportional to the duration of lighr reaching the imaage sensor. Similarly to the aperture, a standardized 2:1 scale was adopted for shutter speed so that opening one aperture f-stop and reducing the shutter speed by one step resulted in the identical exposure. The agreed standards for shutter speeds are typically 1 sec,1/2 sec, 1/4 sec, 1/8 sec, 1/15 sec, 1/30 sec, 1/60 sec, 1/125 sec, 1/250 sec, 1/500 ses, 1/1000 sec, etc. A shutter speed of 1/125 sec lets twice as much light in as a shutter speed of 1/250 sec, but half the light of a shutter speed of 1/60 sec. For example, combining aperture and shutter speed, a shutter speed of 1/125 sec with an aperture of f/16 is equivalent to a shutter speed of 1/250 sec and an aperture of f/8. Alternatively, a shutter speed of 1/125 sec with an aperture of f/16 is also equivalent to a shutter speed of 1/60 sec with an aperture of f/22. Remember that one unit of increment in shutter speed is called a step.
  Numbers to the right are letting 1/2 (or twice as less) light in.