
Why would anyone want to take B & W pictures in this day and age, when we have digital cameras that can capture colors like never before? I'm sure you have your own reasons, but for me, there are two prominent reasons. I love landscape with cloudy skies in B&W because of the contrasts that can be achieved. Also, sometimes, a greatly composed picture with bad color rendition can be saved by turning it to a B & W photograph.
Of course, you can change color pictures to B & W within your camera, but the results are rarely as good as post processing color images on a powerful computer equipped with the appropriate software. Of course, Adobe Photoshop CS3 is great...but expensive. Photoshop Elements does a better job than in-camera processing, but not as good as it could get. My Software of choice is Photoshop Lightroom. In fact, I now use Lightroom for 95% of all my post processing. For B&W, I find Lightroom to be excellent. It has filters that you can apply to B & W images similar to the filters B & W film shooters used for many years. With that capability you can, for instance, apply contrast to blues separately than to greens, etc, rather than darkening or lightening the entire image.
Here is an example of a color picture taken in Yosemite last July, turned to B & W. This is simply an example and I do not pretend to be an "Ansel Adams". This is merely an example to explain the process I use.
 ABOVE: This is the original file in color taken with the K20D and the DA 16-45mm as I recall.

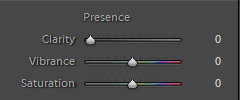
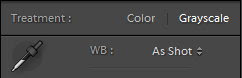 ABOVE: I usually add clarity and vibrance to the image before turning it to grayscale. When the Clarity and Vibrance are to my taste, I change the image to Grayscale.
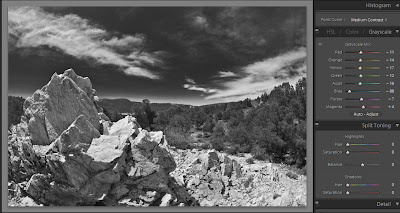
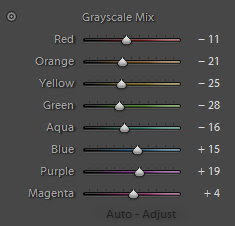
ABOVE: With the Grayscale mix, I can change the contrast by using the filters above, just like during the B&W film era...sort of. Move the blue filter to the left to get a darker sky giving a more dramatic effect.
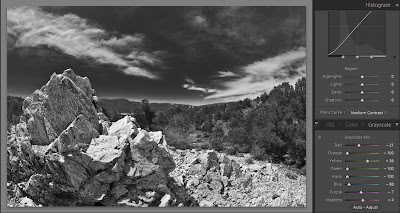
ABOVE: After darkening the sky, I changed the appearance of the B & W picture by adding more green and yellow. It's a matter of taste, and although we may not have the same taste, you get the idea.
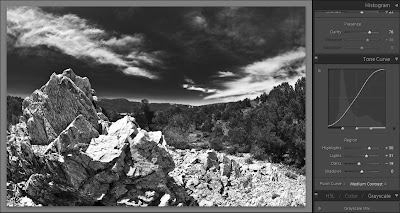

ABOVE: I then use the Tone Curve to adjust the Highlights, Lights, Darks and Shadows.
 ABOVE: Th is the original image. Below is the B & W after processing.

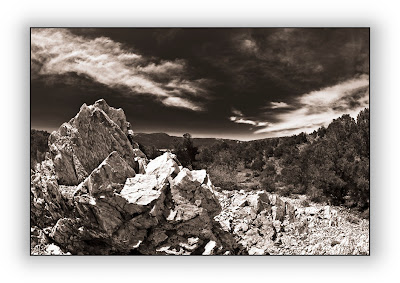
ABOVE: You can also change the look of the monochrome picture in your favorite software by adding a sepia layer.
Now, once you have the B & W picture the way you want, the next major step is to print it. Not too many printers are equipped for great B&W hard copies. To get the most out of the tonal range of B&W prints, you need a printer that has black and different shades of grey ink cartridges. Some of the high end printer models have such capability. I find that sending files to a lab for processing gets me the best results without having to spend big bucks for an high end printer. There are many labs, and here in the USA, I use Mpix and I have always been satisfied with the results. Their prices are reasonable and the delivery is fast. In fact, I had the picture above made in a 20" x 30 and it came out beautifully.
P.S. This article is also posted on the Pentax Forums where Pentax is spoken there. We also recomment Photo-net for Pentax users.
Thank you very much for reading,
Yvon Bourque
4 comments:
I like black and white pictures but I cannot afford Lightroom.
Greatly informative and useful. That's what I'm talking about! Great article that we all can use, if you have Lightroom, I do! Keep up the good articles please.
Good job, Yvon.
I change the clarity *after* conversion to B&W, but that's just a detail.
One thing I do find important is that I usually have to increase exposure by about 0.5 stops, but maybe that's just the way I shoot. Anyone else do this?
Miserere,
You are correct, as to avoid noise in the dark areas, it is better to lean toward over-exposed than unde-rexposed, even if you shoot RAW.
Also, the sequence that one's post process is not as much important as to always make your workflow the same. That way, you can repeat the same procedures all the time.
Best Regards
Post a Comment