Email: brqyvn@gmail.com
Hi Photographer friends,
Autofocus Fine Adjustment
Did you experience front or back focusing problems? Hopefully your camera model has a built-in adjustment, otherwise, you may have to send your equipment back to the manufacturer.
Back and Front Focusing Problems, and how to test your lenses / Cameras.
I personally never had any auto-focusing problem with any lens or camera I ever owned. It seems that these days, members of every blog and forum sites are talking about checking and adjusting the auto-focus on their lenses or DSLR. I think there is a perception that many lenses or DSLR cameras are having front or rear focus problems. In reality, I am inclined to think that inexperienced photographers, “Pixels Peepers”, and inquisitive hobbyists, influenced by the available internet information, are finding problems where there are none. If a particular lens consistently gives out-of-focus results, when all other lenses used with the same DSLR are okay, you might have a focusing problem with that particular lens. If most of the pictures taken with the same DSLR, but with various lenses, are out-of-focus, you might have a DSLR camera-focusing problem.
If you think there is a focusing problem, several "Free" auto-focus testing charts are available from forums, blogsites and websites. I probably downloaded most of them and found inaccuracies with all of them. They are either too small, or too cluttered, or have measurements that are not to scale, etc. Some charts are available for purchase but I find that the prices are way too much.
Back or front focusing problems are more notorious with subjects that are within a shallow depth of field, such as macro pictures or selective focusing pictures, and with the lens used at its widest aperture. The following three images illustrate this. The middle picture is the way it should be as the cat’s eye was the focusing target. The picture on the left shows a front-focusing problem, and the picture to the right shows a back-focusing problem.
That alone would not mean that the lens or camera has a focusing problem, it could be the photographer’s error. However, similar results time after time could be the first hint that you might have a focusing problem. Perhaps a logical next step would be to test the lens in question under a controlled environment. A controlled environment could be where there is no wind, with the camera set on a tripod, and with good lighting. An auto-focus testing chart could be used, preferably one approved by the manufacturer if they have one available.
Solution
I do not believe that manufacturers have an AF checking chart available to the public. That is the primary reason I took it upon myself to design one. After reading every blog and information about the subject on the internet, after reading comments from the readers of my blog site and threads on various forums, I deducted that one chart could not do it all. Three charts were designed because the minimum focusing distance varies from lens to lens. The smaller chart (Chart–1) works well for close-up lenses and lenses that have macro capabilities. The medium sized chart, (Chart-2) works well for normal lenses, say 30mm to 100mm, which have a minimum focus distance needing a target a little bigger than Chart-1. The third chart (Chart-3) is for lenses that cannot focus very close. One could keep enlarging the last chart, but I believe that the three charts attached herein will be functional for the majority of lenses.

There are various opinions whether a chart should be viewed at 45° from the lens centerline axis, or at 30°, or any angle or even flat. The reality is that it should work at any angle between 1° and 99°, but 45° is the easiest to read. Chart-1 and Chart-2 were design for viewing at 45° from the lens’ centerline axis. The measurements on the viewing surface were corrected for accurate reading when viewed at a 45° angle. The Charts could have been designed for viewing at 30°, giving more viewable depth of field for both front and back. However, I opted for the 45° because the charts could fit on a 8 ½” x 11” standard sheet of paper (Letter size).
I chose a circular focusing area. The bottom half is black and the top half is white. When viewed perpendicularly or flat, it has an oval shape, because the chart is meant to be viewed at 45°. When viewed at 45°, the focusing area appears as a perfect circle. That also helps verifying that the lens is at a 45° angle. "Simple geometry"
Camera Settings
Set the camera to:
* -Autofocus single.
* -Leave the Shake Reduction off if you use a tripod (recommended).
* -Use the Aperture Priority mode.
* -Set the lens aperture to its maximum.
* -Set the AF point to center.
* -Use a remote for the shutter release or use the camera timer to avoid any movement.
The two smaller charts were designed so that they can be cut and taped together in a way that they can stand at a 45° angle when placed on a table, desk, or flat surface. The camera / lens is then leveled and preferably positioned on a tripod so that the lens’ centerline is aligned with the center of the chart. Place the lens as close as you can to the center of the chart target while it can still focus on the intersection of the black / white section, then back it off just a little. Position the large chart flat (horizontally) and the camera / lens angled at 45° from the chart.
 After choosing the chart that will work best with your lens, and once the chart and camera / lens are position correctly, start by trying to focus on the white area of the chart. The lens should not be able to focus correctly and it should be “hunting”. If it achieves focus while pointing to the middle of the white area, it means you could actually be in focus with the lines surrounding the white area and you need to use the next larger chart.

Next, move the camera / lens angle slowly downward until it auto focuses. At that point, you know that you are focused on the intersection of the black / white portion of the chart. That is the center of the chart. The measurements (Metric on the left and English on the right) are at zero on both sides of the chart horizontal centerline. Take the picture and look at the results. The center target line (00) should be perfectly clear while the top and bottom target lines and text should get increasingly and proportionally out of focus. The top target lines represent the back focus area while the bottom target lines represent the front focus area. Repeat this test several times to make sure you have done the test correctly. If the center target line is in focus, but the front and back target lines are not proportionally getting out of focus, there shouldn’t be any serious problems with the lens. Remember that this test is done with the lens opened at the maximum aperture and that the depth of field will increase with smaller aperture. Most of the lenses have a “sweet spot which is usually 1 to 2 stop smaller than the maximum aperture. Therefore, you should only be concerned if the center target line is not in perfect focus while either the back or front lines are.
Understand The Results
 |
| Image A: The perfect lens should return a result similar to the image above. |
 |
| Image B: Acceptable Focusing |
 |
| Image C: Back Focusing Problem |
 |
| Image D: Front Focusing Problem |
A lens with acceptable Auto Focus should have the center target line in focus, even if the back and front focus lines are not equally or proportionally out of focus. Image B
A lens with back focus problems will look like Image C, while a lens with front focus problems will look like the Image D
Word About Auto Focus Sensors


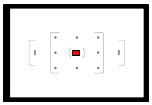
Sensors are either vertical, horizontal or cross type. Most DSLRs now use cross type sensors, check your camera manual. Vertical sensors detect the sharpest horizontal contrast within its area of coverage and lock the focus on that point. Alternatively, the horizontal sensors detect the sharpest vertical contrast within its area of coverage and lock the focus on that point. You guessed it; the cross type sensors detect the highest vertical or horizontal contrast and lock the focus on that point. Since we use the center focus point of our camera, which is usually a cross type sensor, our chart was deliberately designed without any vertical lines in the center so that the focus can only lock at the intersection of the black and white portion of our target. Note that in your viewfinder, you should see an illuminated point showing the focus point. The cross sensor is not necessarily dead center and in perfect alignment with the illuminated focus point. It merely shows you the area of the sensor, but is not an exact focus point and the sensor will only lock on the point of maximum contrast.
Difference Between 45° And 30° Charts
The above charts, one at 45° and one at 30°, illustrates why the depth of field is proportional to the angle of the chart.
These charts will give the same results regardless of of what camera brand you use. However, at the time of design, I was using a Pentax K-5 and the following depicts how to adjust the front/back focus on the K-5.
Refer you your camera user manual for more information on how to adjust your camera specific model.
The K-5 Custom Setting Number 26
In the Custom Setting menu, navigate with the four-way controller to AF Fine Adjustment, Setting number 26 ►.
Use ▲ ▼ to turn the AF Adjustment On or Off. When choosing On, press ► and select if you want to adjust the lens attached or all the lenses ▲ ▼. Choosing Apply One would correct the current lens attached and would keep the results in memory. Choosing Apply All would apply the corrections to all lenses mounted on the camera. The camera can retain settings for up to 20 different lenses. Using the rear rotary dial, you can adjust the values from minus (-1) to minus (-10) and plus (+1) to plus (+10). You can reset the camera to the factory defaults anytime by navigating down ▼ to Reset and confirm Reset.
Disclaimer
Although the Charts have given me good results, you should fully understand how they help analyzing the Auto Focus accuracy. Read the above paragraphs several times until you completely grasp the procedures. You can adjust the focus of all Pentax lenses, as they are non-permanent changes. You can reset the Auto Focus to factory defaults at any time. As for the other Pentax camera models that do not have the “AF Fine Adjustment”, you should only have a Pentax trained technician adjust the Auto Focus of your lenses or DSLR cameras.
Print the charts on your own printer for the best quality possible. It is best to print on heavy mat paper.